
The Python ecosystem has a lot of web frameworks. One that has consistently been popular is the Django framework. It's popular for being robust, secure, and allows developers to develop projects fast and meet their deadlines. It is free and open-source, and it works on both Windows and *nix systems.
In this tutorial, you will learn how to install Django on Windows using pip. After that, you will verify the installation, create a project, and start a Django development server.
Prerequisites
Before you install Django, you must make sure that Python is installed on your system. You can check out this guide — how to install python on windows to learn how to do it.
Before you install Django, you must make sure that Python is installed on your system. You can check out this guide — how to install python on windows to learn how to do it.
Step - 1: Opening Command Prompt (CMD)

Step 2 - Verifying Python Installation
Before you install Django, first, you need to make sure that you installed Python on your system.
To do that, type the following command in CMD prompt to verify the installation:
C:\> python -V
C:\>python -V
Python 3.12.5
C:\>
Now that you've confirmed Python is installed on your system, you will upgrade pip.
Python comes with pip by default. But most of the time, it comes with an old version. it's always a good practice to upgrade pip to the latest version.
Enter the following command to upgrade pip on your system:
C:\>python -m pip install --upgrade pip

Now you've upgraded pip, you'll create the project directory where you'll install Django.
Step 4 - Creating a Project Directory
In this section, you will create a directory that will contain your Django application. We will name it django_project since this tutorial is a demo. But in a real project, you can give the directory a suitable name, such as forum, blog, etc.
Change into your C Drive directory with the cd command:
In this section, you will create a directory that will contain your Django application. We will name it django_project since this tutorial is a demo. But in a real project, you can give the directory a suitable name, such as forum, blog, etc.
Change into your C Drive directory with the cd command:
C:\>cd\
C:\>
C:\>mkdir django_project
C:\>cd django_project
C:\django_project>
In this step, you'll create a virtual environment for your project. A virtual environment is an isolated environment in Python where you can install the project dependencies without affecting other Python projects. This lets you create different projects that use different versions of Django.
If you don't use a virtual environment, your projects in your system will use the same Django version installed globally. This might look like a good thing until the latest version of Django comes out with breaking changes causing your projects to fail altogether.
You can learn more about the virtual environment by following Python Virtual Environments: A Primer.
To create a virtual environment, type the following command and wait for a few seconds:
C:\django_project>pip install virtualenv
OR
C:\django_project>python -m venv venv
Next, confirm the venv directory has been created by listing the directory contents using the dir command:

Now you've created the virtual environment directory, you'll activate the environment.
In this section, you'll activate the virtual environment in your directory.
Run the following command to activate the virtual environment:
C:\django_project>venv\scripts\activate

Now that you've activated the virtual environment for your project, the moment you've been waiting for is here. It's time to install Django!
In this section, you will install Django on your system using pip.
Run the following command to install Django using pip install:
(venv) C:\django_project>pip install django
(venv) C:\django_project>pip install django==3.1
(venv) C:\django_project>django-admin --version
(venv) C:\django_project>django-admin --version
5.1
(venv) C:\django_project>
You've now installed Django on your system, great job! You'll begin to create a Django project.
Step 8 - Creating the Django Project
Now it's time to create a project. A project has a different meaning from what you may be used to. The Django documentation defines it as:
A Python package – i.e. a directory of code – that contains all the settings for an instance of Django. This would include database configuration, Django-specific options and application-specific settings.
You create a project by using the command-line utility django-admin that comes with Django. The command generates files where you can configure the settings for your database, add third-party packages for your project to mention a few.
Create the project using the django-admin startproject command:
(venv) C:\django_project>django-admin startproject test_project
(venv) C:\django_project>cd test_project
(venv) C:\django_project\test_project>dir

The directory test_project contains Django configuration files. The manage.py file comes in handy when starting a development server, and that's what you will do in the next step.
Now that the project has been created, we will start the Django development server.
Start the development server using the manage.py runserver command:
(venv) C:\django_project\test_project>python manage.py runserver

Next, visit http://127.0.0.1:8000/ in your web browser. You should see a page similar to the following screenshot:

Tip You can stop the server by holding CTRL+C. To deactivate the virtual environment, you can type deactivate on the prompt.
C:\> psql -U postgres
Password for user postgres:
psql (15.2, Server version 15.2)
Type "help" for help.
postgres=# CREATE DATABASE my_new_database;
CREATE DATABASE
postgres=# \q
If you find error Postgres "psql not recognized as an internal or external command"
then you do need to set the path to the following: ;C:\Program Files\PostgreSQL\14\bin ;C:\Program Files\PostgreSQL\9.5\lib
PS : 14 is the current version, check whatever version you are on. You can do that either through the CMD by using set PATH [the path] or from my
computer => properties => advanced system settings=> Environment Variables => System Variables
Then search for path.
Important: don't replace the PATHs that are already there just add one beside them as follows ;C:\Program Files\PostgreSQL\9.5\bin ;C:\Program Files\PostgreSQL\9.5\lib
Restart your system and then re-enter
C:\> psql -U postgres
Password for user postgres:
psql (15.2, Server version 15.2)
Type "help" for help.
postgres=# CREATE DATABASE my_new_database;
CREATE DATABASE
postgres=# \q
Now its time to switch from SQLite to PostgreSQL.
open the settings.py file
now change database settings with this template code
now change database settings with this template code
#DATABASES = {
# 'default': {
# 'ENGINE': 'django.db.backends.sqlite3',
# 'NAME': BASE_DIR / 'db.sqlite3',
# }
#}
DATABASES = {
'default': {
'ENGINE': 'django.db.backends.postgresql',
'NAME': 'postgres',
'USER': 'postgres',
'PASSWORD': 'erp',
'HOST': '127.0.0.1',
'PORT': '5432',
}
}
Stop the server by pressing CTRL+C and restart it by following command.

Step 10: Testing Connection
To get Python working with Postgres, you will need to install the “psycopg2” module.
(venv) C:\django_project\test_project>python manage.py runserver
The screen will look like this.

Now the django is connected with Postgresql database.
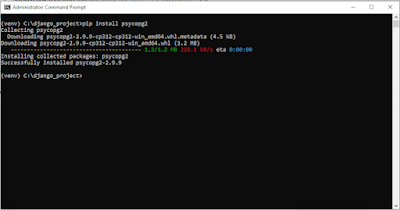
To get Python working with Postgres, you will need to install the “psycopg2” module.
(venv) C:\django_project>pip install psycopg2

Run the following command to migrate all tables in our Django project to PostgreSQL.

(venv) C:\django_project\test_project>python manage.py makemigrations
(venv) C:\django_project\test_project>python manage.py migrate
The screen will look like this.

Writing Your First Python Program
- Create a folder called PythonPrograms on your C:\ drive. You will be storing all your Python programs in this folder.
- Go to Start and either type Run in the Start Search box at the bootom or click on Run.
- Type in notepad in the field called Open.
- In Notepad type in the following program exactly as written:
# File: Hello.py

print "Hello World!"
- Go to File and click on Save as.
- In the field Save in browse for the C: drive and then select the folder PythonPrograms.
- For the field File name remove everything that is there and type in Hello.py.
- In the field Save as type select All Files
- Click on Save. You have just created your first Python program.

No comments:
Post a Comment